Showing posts with label mid-century modern. Show all posts

Wednesday, January 2, 2019

I'm a Pinterest Mom: Perfect Playroom Office Combo


Disclaimer: All posts beginning with "I'm a Pinterest Mom" are not meant to be snarky. I legitimately enjoy being that mom. I don't own a vinyl or sewing machine, but darn it if Etsy isn't my next best friend. Crafting and creating and designing are things that relieve stress and give me joy. Don't knock Pinterest moms until you get to know them! From home design to birthday parties and recipes - I am a Pinterest Mom... and proud of it.

Perfect Playroom Office Combo

When we moved into our new house, I was determined to have a space for myself. Back up...When we decided to move, one of the must haves was an area for the kids to play and some office/personal space for myself (whatever that looked like), and of course another room for baby #3 on the way. My husband is obsessed with the front and back yard and, lets be real, the kids get the entire rest of the house, so why not a space for mom that doesn't include a stove or washing machine?

Fast forward, low and behold in the house we bought, there WAS a desk nook in the kitchen that would have been perfect...but then we remodeled and out went the desk. We thought of ways to salvage the material and recreate the built in look in our "bonus" room but it wasn't worth the effort. Also, once we actually got to taking the cabinets out and down and removing the granite, it was basically ruined in the process. No further comments there.

The bonus room we scored in our new house is rectangular, so dividing the space was luckily pretty easy. Using large rooms for different purposes is always challenging! You will probably rearrange the placement of furniture a few times until it works, because your idea probably can work! I kept in mind what I wanted people to see when they walked in the front door, since this particular space is the first thing you see when you walk in. We thought a TV and kids space on that end, first, but quickly realized keeping it "tidy" would be a challenge since there is a lack of wall space for storage. Storage galore for all things toys and arts and crafts and dinosaurs and trucks and dress up stuff and blocks and eek - the list continues.

We flipped the script and ended up with mom/office area on the end you see when you enter the house, and kid/play area on the opposite end of the space. We settled on a beautiful, dreamy and modern desk and some wall mounted shelving (uh, yes, those are from IKEA! WHAT?!) for my end of the space. It's actually better (and more feng shui if I'm getting technical) that way because the view from my desk is spectacular, the view from the entryway is beautiful and inviting, and plus, there is more wall space for toy storage and a small table/chair set for the kids on the other end of the room. We debated on keeping our 'click clack' couch because of the space it consumes but while the kids are little, it makes sense to have a space for parents or babysitters to sit and play or supervise.


Keep in mind, for any space you're trying to make work - think about what the space will be used for and your lifestyle and personality. We chose the set up we did because 1. I wanted it to be aesthetically pleasing and an inviting space to get work done 2. My kids do more arts, crafts and floor play right now so they needed more of the room than I did 3. I use my desk a few hours a week, nothing crazy, but it's nice to be able to work and watch the kids at the same time (plus a view out the window doesn't hurt). Make your space work for you - even in your design. Making a space functional and practical doesn't mean it has to be ugly, either. Space planning is hard and usually takes a lot of arranging and rearranging. Get advice or input - or call me!


Sunday, December 2, 2018

Pinterest Win or Pinterest Fail: Nursery #3 Reveal!

A few weeks ago I posted this blog for baby #3's nursery inspo.

I am happy to say the nursery is DONE! We made it our mission to be done before the holidays and we knocked it all out just in time for Thanksgiving, and that is something to be thankful for! Now we can sit back and enjoy one last holiday season with only 4 little feet running around as opposed to 6 (eek!).

Oddly enough, maybe because it's 3rd times a charm, I don't know, but this was the EASIEST of the three nurseries! Now, I fear my husband might make me spruce up the other two because this one is.. legit, for lack of a better term.

Now, was this a Pinterest Win or Pinterest Fail? I'm calling it a win - maybe not exactly how I imagined when first perusing Pinterest but, definitely perfect for welcoming home our Violet Blake. (Side note: every time I walk by the room, I smile a little on the inside. This is one room I am insanely proud of!)

Here it is, the (third) big reveal! I literally linked almost everything - the wall paint is Gentle Rain by Bher.


This is the wall across from the entry. 
Curtains: Z Gallerie (used to hang in our old living room); Rocker: who knows, used with two previous babies; Basket: Container Store (here); Wooden stool: At Home (here); Geometric Shelves: Hobby Lobby (two sizes - here) but I added the paper to them (it's wrapping paper that I cut to fit and used modge podge to adhere to the metal; the paper matches the pillow!); Swag: Hobby Lobby (here); Dresser: mine from when I was little, re-purposed once for my son and then again for baby #3 - bought gold hardware from Home Depot and used left over navy paint from our kitchen remodel; Lamp: At Home (here); Curtain Rod: Amazon (here); Pillow: Here


This wall is to the left of the changing table/dresser and faces the closet.
Name sign: Etsy (shop here) - I spray painted it with gold glitter when it arrived; Pictures: Hobby Lobby (elephant & ikat) - I used gold paint on the frames and on the pictures themselves, I also had a monogram made and stuck it onto the ikat print (see below); Flowers: a mix of Hobby Lobby (here) and the others were donated by a friend - I used blush pink chalk paint (find it here) on a few of them; Crib: Babyletto but was my daughter's before; Crib Sheet: Amazon (find it here); Basket: Container Store (here)


This is a bit of wall space next to the closet. My dad built the bookshelf and it's original purpose was to hide behind a door, however, the closet doors are behind the entry door. I love how this little corner turned out, though! Wall art: Hobby Lobby; Hooks: Amazon (here). 


This wall is just to the left of the entry, so just inside the room. 
White shelf: used for other daughter's room previously, Hobby Lobby; Arrow: Hobby Lobby and added the twine for the bows; Globe: Hobby Lobby; Shelves: Hobby Lobby (see above); Mirror: Hobby Lobby (here); Baskets: Container Store (here); Rug: RugsUSA (here) and OMG!!! This rug is AMAZING and actually REALLY soft!  


Here are some pictures of a few of the DIY's from above: 


Monday, October 29, 2018

Well, We Won't Be Doing That Again - Kitchen Remodel Part 7

Well, we won't be doing that again. I know, never say never. Even through the plague, we are so thankful this project came together (and came to an end). We are hoping and praying everything checks out with the inspection but all, in all, we are very pleased. As previously mentioned, it was not for the faint of heart. Remodeling is NO JOKE and it is definitely no HGTV, picture perfect process.

Also, it just goes to show you, that even though everyone else on the internet, with their picture perfect Instagram, seem to do these kinds of projects without issue or frustration - it's totally there. No matter how good the idea is or how beautiful the outcome, there was definitely a curse word said... or two or two hundred.

We learned so much - about things I don't care to ever encounter again - and some pretty hard lessons. Financially and logically we should not have undertaken a project of this magnitude. We should not have tried to help out a budding contractor because we felt for him. We should have researched and inquired more. We should have been patient and enjoyed our new home as it was for a while.

What's done is done and we are so thankful it is...done. All in time for our kids' birthday party and friends and family to visit!

Here is the final reveal of our kitchen. Caution: These are not professional photos, you will notice the terrible lighting, stuff lying around and dishes by the sink because... we are normal. Enjoy!

We spray painted our bar stools navy, the pendant lights are from Lowe's, the lamp is from Target, I sanded and stained the support under the granite (someone tried to tell me that it was unnecessary... huh?!?!), the track light is from amazon and the fan is from Home Depot. 

Opposite view - we removed the double doors to the dining room. That helped to open the space up, also. Now I have a cute coffee bar in there! 

Ignore the mismatched tile but notice the ice maker and wine fridge - so fun! Fun Fact: We found terrazzo flooring underneath the tile and restoring it might be our next project *insert evil laugh*. If you're not familiar with terrazzo - get familiar. It's basically a piece of (expensive) history in our home.
Note: Dishes by the sink. Debating on adding hardware but, one thing at a time, people. The track light replaced a nasty, huge square fluorescent and the fan replaced a nasty and tiny white fan. Fan in the kitchen - life saver! 

The next light to go - above the kitchen table. We decided to keep this L portion of the bar because it would have been a lot of dead and wasted space. Our breakfast area is already exceptionally large. You'll notice, too, we got rid of the entire, huge, walk-in pantry. The door in this picture was a cleaning supplies closet but is now the pantry and works great. Most of the food we eat is in the fridge or freezer or bought the week of cooking so our pantry didn't need to be huge. Our previous house had a small pantry, too, so it works for us! 


Part 1
Part 2
Part 3
Part 4
Part 5
Part 6

Sunday, October 28, 2018

Race to Finish - Kitchen Remodel Part 6

After the plague, things picked up. Well, after our BEAUTIFUL counter tops were installed, things picked up. Supposedly that was the missing piece to getting this thing done. Even the granite didn't come without issue though - the original one we picked was said to be "too soft" and would scratch easily (why no one told us before is beyond me), then we had to wait for the weather to clear up. Who knew cutting granite generated so much dust? That dust, when mixed with water, can turn into some really hard to clean paste. However, the finished product of the counter tops was well worth it.

Counter tops went in, cabinet paint was finished, floors were patched, back splash went in, electric was done. Even though there was a lot of doing, and re-doing, we could see the end. Here are a few more progress pics....


With a few stern words and tough conversations about needing to "get'r done", the contractors stayed late a few days to finish up. We had a grout issue and mismatch tile issue. Floors are the next project but not for a while. The grout issue was major, for me, because it stuck out like a sore thumb. It was too dark. BUT, did you know, there is grout paint?!?! It was a time and life saver for the contractors because I was NOT a very happy camper.

Grout paint cleaned up - left, grout painted on - literally with a paint brush - center, original (too dark) grout - far right.


Once all that was in and things were still being buttoned up, we realized the wall color - a flat, builder beige - was not going to work. We absolutely loved the color we chose for our previous house so we decided to go with that. It took the stress out of trying to find the right color, that's for sure. And yes, we went cheap - good ole' Gentle Rain  by Behr.

To all the painters who wanted me to spend an arm and a leg on paint -

Why would I spend money on expensive paint when we have a four year old, a two year old, a huge and clumsy dog and are about to welcome a newborn to the Walker clan, who all, at any given moment, can projectile vomit, lose the lid to a sippy, or splatter food/water/mud/etc all over said paint? We bought the most economical, but durable paint. It's paint. Not a purse...or shoes. So for all you Benjamin Moore, Farrow & Ball, Pratt & Lambert snobs lovers- buzz off. We will stick to our beloved Behr and Valspar, k thanks.

Final reveal will be posted next!!!!! YAY! The saga has an ending!

Part 1
Part 2
Part 3
Part 4
Part 5

Thursday, October 25, 2018

The Plague Worsens - Kitchen Remodel Part 5

Kitchen Remodel Part 1
Kitchen Remodel Part 2
Kitchen Remodel Part 3
Kitchen Remodel Part 4

So, picking up where we left off with our lovely rodent friends from Part 3, I took a little field trip to the local DIY pest control place because clearly our current pest control guy was NOT capable of getting rid of these things. Also, there wasn't much we could do about the power line but wait for the plumber to HOPEFULLY agree to fix it!

I learned so much at the DIY place from my new friend, John. Did you know rats can enter your home through a quarter size hole?! If they can get their head in, they can get their whole nasty body in! Did you know poison packets are super cheap?! And that the trick to getting rodents to eat them is PEANUT BUTTER (well, we used almond butter because #paleofriendlyhousehold, I'm THAT mom) - genius. Screw the pest control guys who tried and failed three times. I checked out with poison packets, odor control sponges, some bug/mosquito killer (because again, Houston), a mask, a sprayer and a head full of ways to kill things. I was as ready as Rambo.

I came home ready to kill some stuff only to find out about another fun issue...

Bees.

Honeybees, to be exact.

That's right. You know, the kind you really shouldn't kill because they are becoming extinct and throwing off the ecosystem - yea, those.

We had noticed one or two here and there since, hello, the attic had been exposed for over a week at this point. The electrician who finally decided to show up, said he had been stung and wasn't able to work up there because there was a swarm of them. This was something else, I tell you what. I killed about 15 bees in 30 minutes. The weird thing? They weren't trying to come after me, they were trying to get outside.

So, I made a call to my new pest control friend and his first question was, were they there before? I thought about it and remember that right before we moved in, a bee keeper came and took away a whole honeycomb. I told him that and his response was that they were back and ready to set up shop again.

Bee facts: 1. There are seekers and workers and honey makers. 2. The bees that were there were seekers. 3. Honeybees leave behind a pheromone that the seekers...seek... and if found, they will alert the workers to set up shop again. They are erratic and not out to harm - hence flying into windows and not attacking me. 4. A pheromone is a secreted or excreted chemical factor that triggers a social response in members of the same species. 5. The bee keeper did NOT spray to get rid of the pheromone, NOR did he properly seal the roof flap to the attic, hence the reason for The Return of the Honeybees. 

So now, not only am I Rambo the Rat Killer, I am killer of all the things. However, bees don't play so I called someone. Luckily, they had not nested and so killing them was socially acceptable (and cheaper)!

To recap - we've had a major plumbing issue, changes to the design and scope of work, a rat infestation, a power line down and Return of the Honeybees. That's when I started writing all of these posts... See part 1. 

The bee man came out, the poison packets went into the attic, Greg ended up throwing out BAGS of soiled insulation and 4 rats, drywall was up, lights and outlets had been cut out and wired, cabinets had been primed, counter tops and our new cabinet had been framed in... things were looking up. We were going to make it after all.


Kitchen Remodel Part 1
Kitchen Remodel Part 2
Kitchen Remodel Part 3
Kitchen Remodel Part 4

Tuesday, October 23, 2018

No Power? No Problem! - Kitchen Remodel Part 4

Kitchen Remodel Part 1
Kitchen Remodel Part 2
Kitchen Remodel Part 3

I realized while trying to write all of this out that so many issues overlapped and yea, yea we really weren't under construction forever. So, for all of you who said "It will be over before you know it," you win. Now you can sit back and say, "I told you so!"

Being in the thick of things was definitely not easy. Much like parenting and marriage and other hard things. Every day there was some new issue or frustration. There was one night, after the bomb I'm about to drop on you came to fruition, that I told Greg if one more thing came up, we just needed to torch the place and start over or move out. Dramatic, much? I was serious. We were over it.

So while dealing with contractors, a painfully slow remodel, and now rats, we had another fun issue. One we thought was tied to the remodel but wasn't.

One morning, while getting ready, the lights were flickering pretty badly. Sometimes that means the bulbs are about to go out but it was odd. I got out of the shower and half the power went out. I don't mean half the house or just the lights. I mean, one outlet worked and one light didn't in one room and the next room half the lights and outlets worked, the AC worked and the fridge worked but the microwave didn't. It was very odd. Greg called the home warranty company, that had only come through with ONE request so far (the fixing of our garage door!), and I called the electric company. Both were going to cost time and money but, hello, we needed power.

The electrician the home warranty sent, and the electric company both said that our main power line had been severed. A power line can go out even just by nicking it with a shovel. They also both said it was more than likely due to the plumbing work that was done.

Thank GOD we called 811 and had the line marked before the plumbers dug anything up. I mean, there was a good 4ft deep trench in our backyard while they re-piped the sewer line. Our next call was to get quotes. Turns out, replacing and burying 60+ feet of power line can cost anywhere from $2500-$3600! We didn't have that. We kept digging and researching and then realized we needed to get the plumber involved. We did our part, calling 811, they needed to help us fix this.

Unfortunately, our neighborhood wasn't one where the electric company owned the line - otherwise, they'd fix it all and we would be set. The electric company came and put in a temporary line that we were able to use for a month. Yes, it took a month, to the day, to get the line fixed. Now that it is done, our backyard is still a mess.

There will be more issues along the way but with a finished product that diminishes the stress of all of this. Man, what I would have given to know and see what I have now.

If you're wondering why there aren't many remodel pictures. It's because things literally didn't look much different in these weeks. Here are a few more - we finally trained the contractor to cover the ceiling when they left for the day. There is more to the kitchen remodel saga, so stay tuned.


Kitchen Remodel Part 1
Kitchen Remodel Part 2
Kitchen Remodel Part 3

Wednesday, October 17, 2018

Demo Days & The Plague - Kitchen Remodel Part 3

Kitchen Remodel Part 1
Kitchen Remodel Part 2

This is not your typical renovation blog series. Sorry, not sorry. We didn't lift a hammer. Again, sorry, not sorry. This is essentially a safe space for me to whine and moan and hopefully, one day, look back and laugh.

There are those who renovate and those who pay-to-renovate. Let me clarify, I love me some projects. My husband, not so much. I get the good ole eye roll every time I have a "bright idea." Which subsequently seems to (almost) always occur while pregnant. I would also love to be the one to do the renovation but, lets be real, I'd probably kill myself trying to knock down a wall and I just don't care THAT much. My husband, would want nothing to do with said wall. Which is fine. Totally get it.

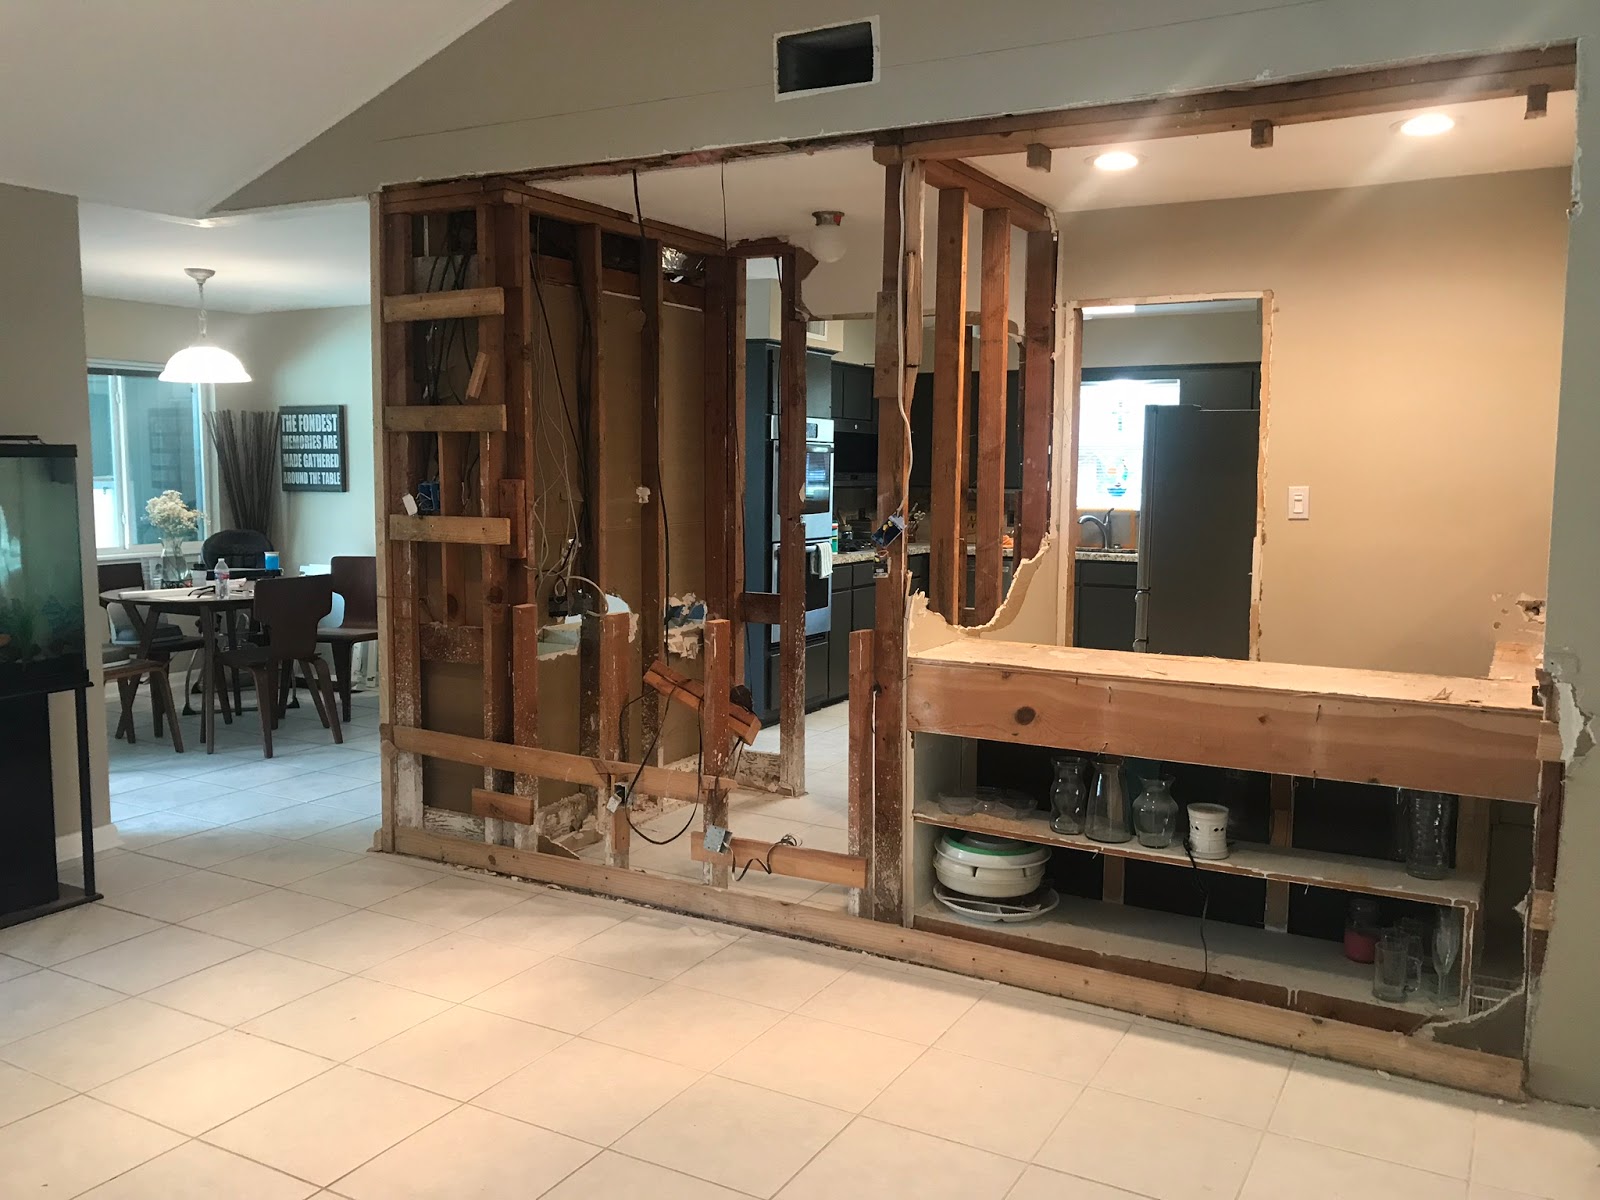
Day 1 of the kitchen remodel was so, so, so exciting! I totally felt like I was on the set of some major HGTV show. There were loud bangs, and high pitch squeaks, and sounds of a saw and lots of things hitting the floor. It had begun! We were stoked!

For about a week. Then progress slowed. I mean almost a screeching halt. Of course everything was to blame... I changed my mind, the counter tops weren’t in, waiting on the electrician... excuse after excuse. Much to our dismay and according to our remodel veteran friends, these excuses were normal.

Our attic had been exposed due to changing the ceiling height and the installation of support beams, and the smell of sheet rock and musty attic filled our house. For a hypersensitive prego and her husband, who has a sense of smell like that of a freaking dog, it was not pleasant. Something wasn't right. My husband insisted the smell was something else and I hate to even document this but, he was right.


Some back story for you (and another expense I forgot to mention during our short 1 month in our home): Before we bought the house, we did our due diligence and we had the house inspected by a fantastic inspector (I have to put this in here because most everyone says, "Didn't you have the house inspected before moving in?" Yes, Carol). He pointed out that the HVAC duct work in the attic was all torn up on the kitchen side of the house and suspected rodents once lived up there. Before we purchased the home, it sat vacant for a good year so we were not surprised by this news. We had our trusty HVAC guy come and repair the duct work ASAP because Houston summers are no joke. Anyways, we weren't concerned about current rodents because he didn't notice any fresh feces (yummy) or traces of nesting.

Fast forward 3 months from inspection - holy rats nest, did those turds (literally) come back and wreak havoc on our attic and senses! It was awful! The contractors also noticed and even snapped some pictures of these cat sized rats - gross! Pest control came out on THREE occasions and it did NOTHING. During this time, it had been a question of "what next?"

And you'll see... stay tuned! Until then... I realized I never posted pictures of the OUTSIDE of our home. OOPS! For those who love mi-mod's as much as we do, here is our 1960's charmer (#allthehearteyes)


Kitchen Remodel Part 1
Kitchen Remodel Part 2